Portable Cell Network
This project is deployable on Raspberry Pi using BladeRF and allows for the creation and operation of a custom local GSM cell tower.
Project Documentation
Project By: Matthew May & Brendan Harlow for Champlain College SEC-440
Introduction
The goal of this project is to create a private secure portable cell network utilizing basic technologies for mobile phones that can be easily deployable in any situation. In the event of an emergency, commodity cell networks can easily become severely congested and overwhelmed. Having the ability to set up secure and reliable communications for civilians or law enforcement can save lives, facilitate responses, and provide confidence in decision making.
The radio system that we are using for the cell phones to communicate with is the GSM protocol (Global System for Mobiles) more commonly used by cellular provider such as AT&T and T-Mobile. To broadcast the radio system, we are going to be using a Software Defined Radio (SDR) device called the BladeRF (external). This hardware is controlled by the Raspberry PI (small single-board computer) (external) using YateBTS (external) which is software that implements functions and protocols of both the radio access network and the core GSM network to allow cell phones to communicate using voice, text, and data. The Raspberry PI is instrumental to reach our goals of portability due to its size, low power usability, and cost over alternatives.
Prerequisites
To deploy the portable cell network using our instructions you’ll need the following:
- Raspberry Pi (We used a 3rd Generation Model B Pi)
- MicroSD Card (32GB Recommended)
- Nuand BladeRF (We used the BladeRF x40, the smaller card offered by Nuand)
- SSH enabled on the Pi (For ease of use, Terminal works fine too)
- GSM and SIM card compatible phones
- SIM Cards (sysmoSIM-GR2) (!!! VENDOR (AT&T, VERIZON, ETC.) CARDS DO NOT WORK !!!)
- Compatible SIM Card Reader (What we used: http://www.smartcardfocus.us/shop/ilp/id~618/acr38t-d1/p/index.shtml)
- OR leave REGEX field empty or set to ‘
*’ to allow SIM’s to connect to network without assigned numbers/keys
- OR leave REGEX field empty or set to ‘
- Ethernet Cable (If you desire the phone’s to have local internet connectivity)
Nuand bladeRF Setup
You must install the necessary dependencies to the environment.
pi@raspberry:~$ sudo su
root@raspberry:/home/pi# apt-get update
root@raspberry:/home/pi# apt-get -y install git telnet apache2 php5 libusb-1.0-0 libusb-1.0-0-dbg libusb-1.0-0-dev libgsm1 libgsm1-dev cmake automake
Plugging the Nuand bladeRF x40
Now you will plug the Nuand bladeRF x40 into one of the USB ports of the Raspberry Pi to ensure that it is being properly detected.
root@raspberry:/home/pi# dmesg
[ 2092.437659] usb 1-1.2: New USB device found, idVendor=1d50, idProduct=6066
[ 2092.437679] usb 1-1.2: New USB device strings: Mfr=1, Product=2, SerialNumber=3
[ 2092.437692] usb 1-1.2: Product: bladeRF
[ 2092.437704] usb 1-1.2: Manufacturer: Nuand
[ 2092.437716] usb 1-1.2: SerialNumber: 4c132c8ba43e0c4d922418a29a1ce207
Nuand bladeRF Source Code
Download and install the Nuand bladeRF source code.
root@raspberry:/home/pi# cd /tmp
root@raspberry:/tmp# wget -c https://github.com/Nuand/bladeRF/archive/master.zip
root@raspberry:/tmp# unzip master.zip
root@raspberry:/tmp# cd bladeRF-master
root@raspberry:/tmp/bladeRF-master# cd host
root@raspberry:/tmp/bladeRF-master/host# mkdir build
root@raspberry:/tmp/bladeRF-master/host# cd build
root@raspberry:/tmp/bladeRF-master/host/build# cmake -DCMAKE_BUILD_TYPE=Release -DCMAKE_INSTALL_PREFIX=/usr/local -DINSTALL_UDEV_RULES=ON ../
root@raspberry:/tmp/bladeRF-master/host/build# make -j4
root@raspberry:/tmp/bladeRF-master/host/build# make install > install.log
root@raspberry:/tmp/bladeRF-master/host/build# ldconfig
Nuand bladeRF x40 Firmware
Download and install the Nuand bladeRF x40 firmware v1.9.1.
root@raspberry:/tmp/SubversiveBTS/yatebts# cd /tmp
root@raspberry:/tmp/# wget -c http://www.nuand.com/fx3/bladeRF_fw_v1.9.1.img
root@raspberry:/tmp/# bladeRF-cli -f bladeRF_fw_v1.9.1.img -v verbose
After install the firmware v1.9.1, unplug the Nuand bladeRF x40 from Raspberry Pi USB port and plug it again to start the device with the new firmware.
Now is time to check installed versions of bladeRF-cli, libbladeRF, Nuand bladeRF x40 firmware and Nuand bladeRF x40 FPGA.
root@raspberry:/tmp/# bladeRF-cli -i
bladeRF> version

  bladeRF-cli version:        1.3.1-git-unknown
  libbladeRF version:         1.6.1-git-unknown

  Firmware version:           1.9.1
  FPGA version:               Unknown (FPGA not loaded)

bladeRF>
Exit from bladeRF prompt typing ‘quit’.
Raspberry Pi Setup
Click here for a photo-rich version of these instructions.
- Plug-in the Ethernet, Power Supply, and Keyboard to the Pi and then plug the power adapter into the wall. When you reach the login screen login with the default credentials
- Username: pi
- Password: raspberry
- Run
sudo raspi-config
Change Keyboard Layout
- Scroll down to ‘Localisation Options’ and press ‘Enter’
- Scroll down to ‘Change Keyboard Layout’ and press ‘Enter’
- Scroll down to ‘Other’ and press ‘Enter’
- Scroll down to ‘English (US)’ and press ‘Enter’
- Scroll to the very top to ‘English (US)’ and press ‘Enter’
- Hit ‘Enter’ to accept the defaults on the next two screens, since they don’t apply.
- When you get past the last two steps you will be returned back to the main menu.
Enable SSH
- Scroll down to ‘Interfacing Options’ and press ‘Enter’
- Scroll down to ‘SSH’ and press ‘Enter’
- Scroll to ‘Yes’ and press ‘Enter.’
- On the next screen, press ‘Enter’ to go back to the main menu.
- When you’ve reached the main menu, scroll to the right and select ‘Finish,’ then press ‘Enter’
- When back at the terminal, run the command below to enable the configured settings.
sudo reboot now
Network Deployment
To make your life easier, SSH to your Raspberry Pi. Note your Pi’s IPv4 address from the command below:
ifconfig eth0
On another computer, utilize a terminal application and run:
ssh pi@[INSERT PI IPV4 ADDRESS HERE]
- Once prompted for credentials, again, enter:
- Username: pi
- Password: raspberry
Now we are interacting with the Pi remotely.
Let’s start gathering what we need for deployment.
# Download the script from GitHub
wget https://raw.githubusercontent.com/MBRO95/PortableCellNetwork/master/PortableCellNetwork.sh

# Make the downloaded script executable
chmod +x ./PortableCellNetwork.sh
The script will check to make sure you’re running as root, so make sure you don’t leave out the ‘sudo’ portion of the commands below.
To run the script without logging its output, issue:
sudo ./PortableCellNetwork.sh
To run the script while logging its output, issue:
sudo ./PortableCellNetwork.sh | tee install.log
- The script will query you for a network name
- Provide one and confirm it
- OR
- press ‘Enter’ to accept the default name of ‘DuaneDunstonRF’
- Confirm your network name
- The script will now initiate the installation and configuration process. This will take close to an hour so you can go find something to do in the meantime.
- When the script is nearing completion it will query for a new user password for the ‘pi’ user.
- Enter and re-enter this password to change from the default for added security.
When the script completes it will report how much time it took to run and wait for a keypress to reboot.
- Press any key to reboot the pi.
- You will be rebooted into a desktop environment, simply select the ‘Default Configuration’ option at the pop-up that launches at first boot.
- A startup script titled ‘StartYateBTS.sh’ will await you in ‘/home/pi’ and will start the cell network processes.
- To boot the startup script it is imperative that it is run in interactive mode by passing the ‘-i’ flag after the script name, like below:
sudo ./StartYateBTS.sh -i
Once started, this script will:
- Open a terminal window reporting the Yate (cell network) status
- Open a Firefox browser window that will navigate to YateBTS (web-based cell network configuration)
- Here you can view/modify network configuration settings and manage/write SIM cards for devices.
Phone Deployment
To join a compatible phone to the cell network, SIM cards need to be deployed to work with the correct settings. YateBTS uses a utility called PySIM, a python tool for programming SIM cards. In the installation script PySIM is already set up as the correct version that supports the SysmoSIM-GR2 card type. To start, make sure that the compatible SIM card writer is inserted into the Raspberry Pi with the SIM card to program already in it.
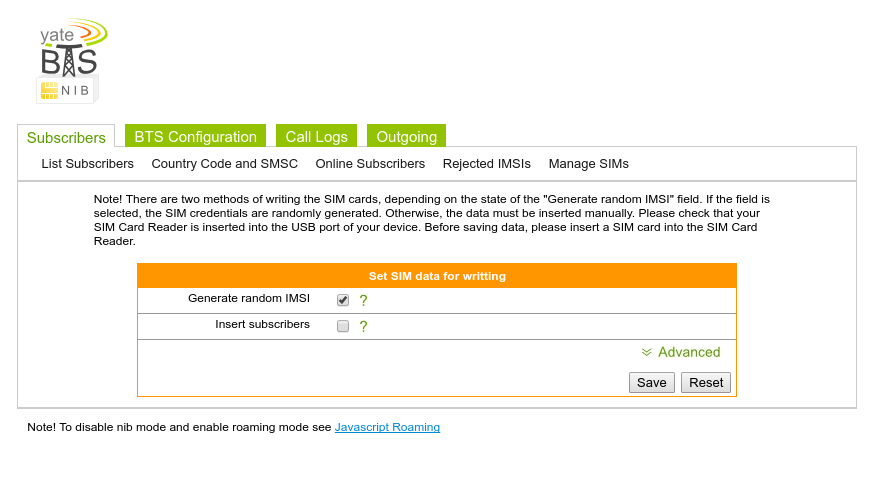
Open the tab called Manage SIMs as shown below and make sure that the Generate random IMSI setting is checked and the Insert subscribers is unchecked. The insert subscribers setting will break the functionality of the cell network and is recommended to avoid unless there is a fix for it.
The next step is to check that the correct settings have been set in the Advanced drop down bar. Make sure the Operator name reflects the correct setting that was chosen for the cell network. Otherwise use the default settings and hit save.
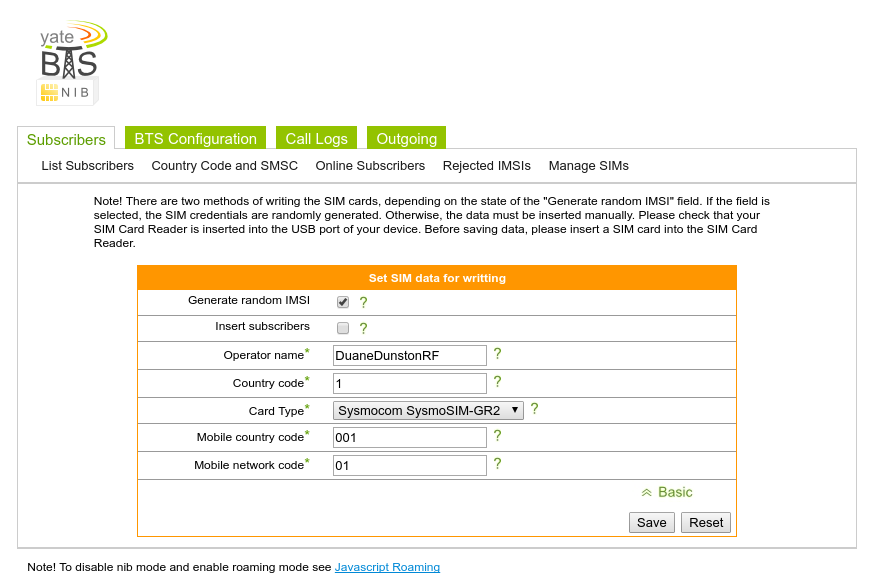
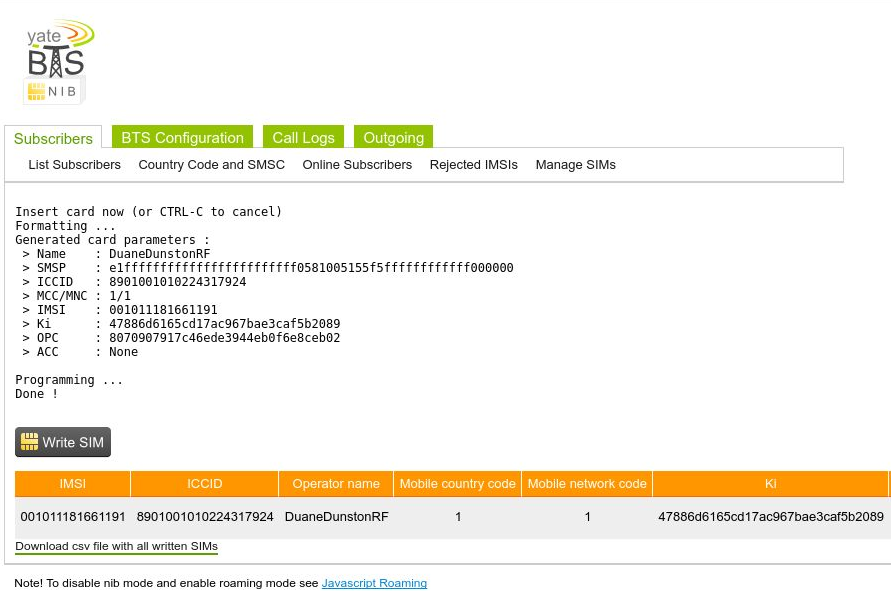
The screenshot below shows an example output that the SIM programming was successful. And lastly that the deployed SIM card shows in the Manage SIMs list.
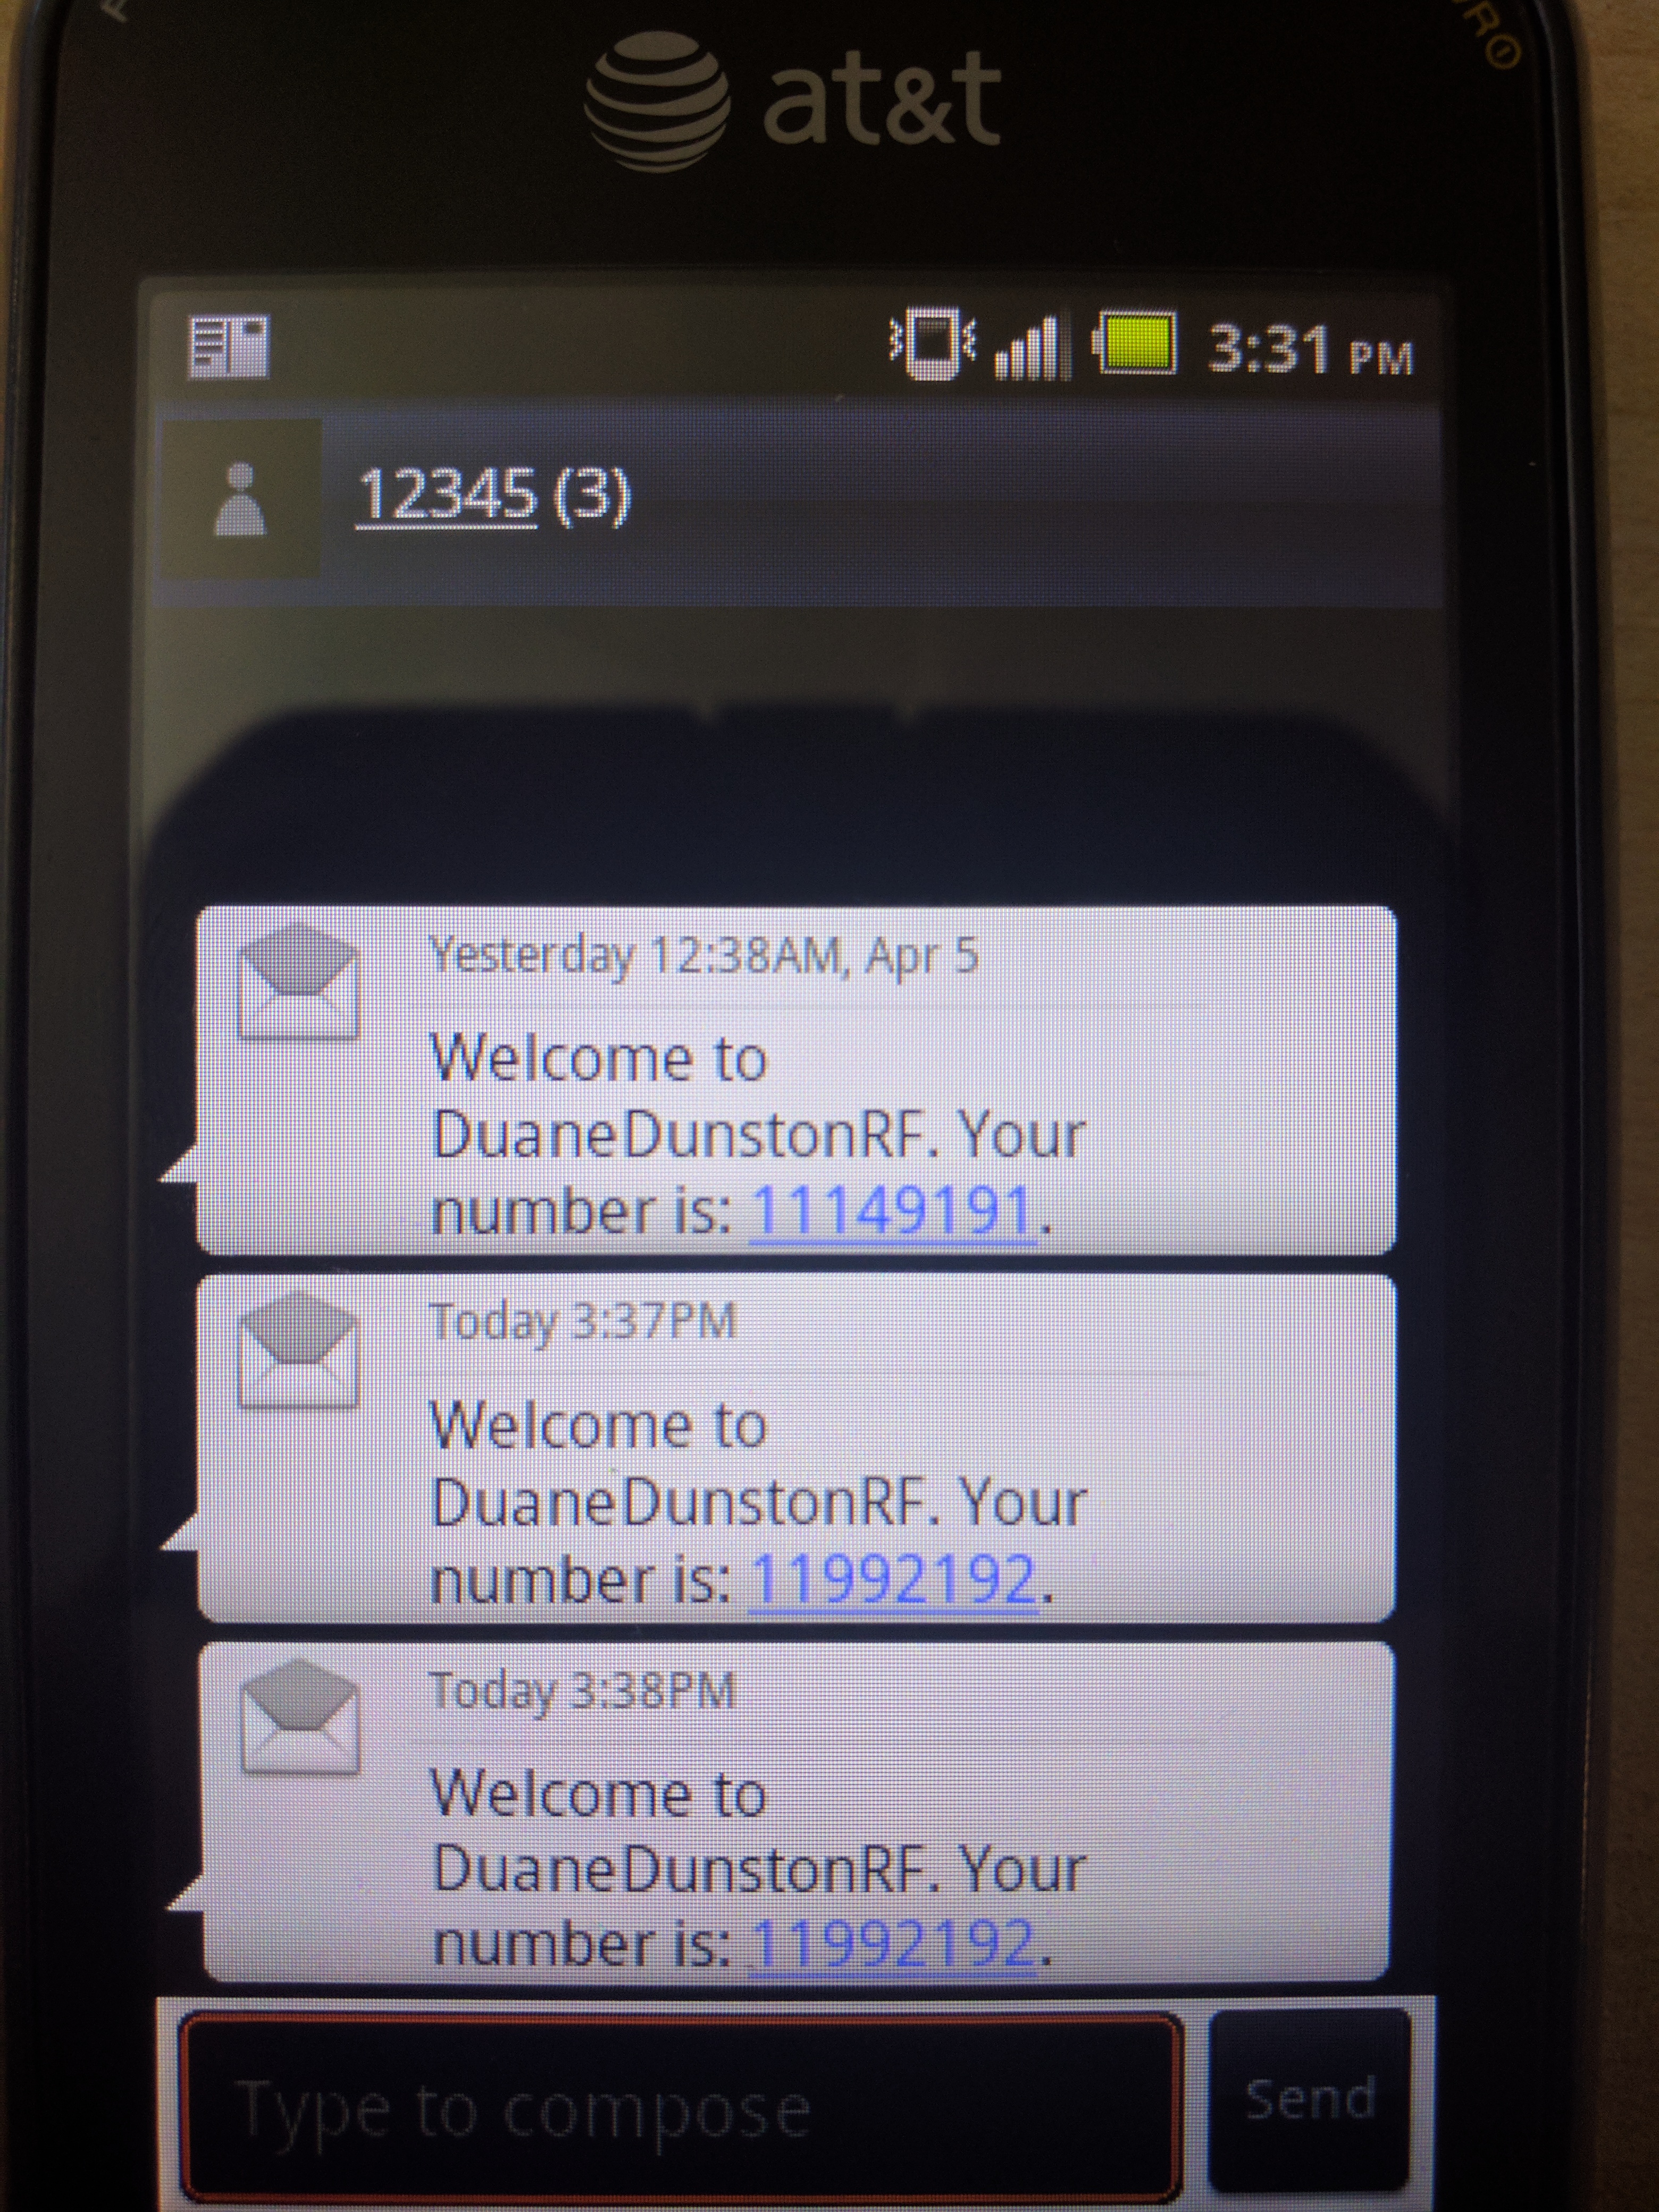
After inserting the SIM card into the GSM phone and powering on, YateBTS will send a welcome message with the assigned number for the phone as shown in the screenshot below. To troubleshoot if the Android phone is not connecting to the cell network properly, open the dialer application and type *#*#4636#*#*. A menu will appear and in the phone information tab, select the preferred network type to be GSM only and restart the phone.
Security Overview
A security model was implemented in our installation script based on the Center for Internet Security (CIS), which is a highly reputable source for best practice information security. The script incorporates a benchmark model designed for Debian 8 operating system. The Debian 8 operating system is the closest relating Linux distribution to the Raspberry Pi image, therefore we decided that this model was the best choice to use for reference. Originally, we did run into a set back with the security functionality of the Raspberry Pi because it does not support custom partitions that can implement security controls, such as full disk encryption and partition modifiers that deny arbitrary executions and protect against attacks that fill up disk space. The goal of the security script was to implement as many controls as we could while keeping the functionality of the Raspberry Pi operating system and the Yate software.
The model follows the practice of disabling anything that is unnecessary to the functionality of the system to reduce the potential attack surface. Performing periodically updates and patches to fix security flaws can be a challenge for a system that is designed to be mobile and in areas where there may not even be access to the Internet.
Update the operating system
Rationale: Periodically patches contain security enhancements, bug fixes, and additional features for functionality.
sudo apt-get -y dist-upgrade
Enable sticky bit on all world writable directories
Rationale: Prevent unauthorized users from modifying or renaming files that belong to a different owner. echo “Setting sticky bit on world writable directories”
df --local -P | awk {'if (NR!=1) print $6'} | xargs -I '{}' find '{}' -xdev -type d -perm -0002 2>/dev/null | xargs chmod o-t
Remove unnecessary filesystems
Rationale: Removing support for unneeded filesystem types reduces the local attack surface on the Pi.
echo "install cramfs /bin/true" >> /etc/modprobe.d/CIS.conf
echo "install freevxfs /bin/true" >> /etc/modprobe.d/CIS.conf
echo "install jffs2 /bin/true" >> /etc/modprobe.d/CIS.conf
echo "install hfs /bin/true" >> /etc/modprobe.d/CIS.conf
echo "install hfsplus /bin/true" >> /etc/modprobe.d/CIS.conf
echo "install squashfs /bin/true" >> /etc/modprobe.d/CIS.conf
echo "install udf /bin/true" >> /etc/modprobe.d/CIS.conf
Remove unnecessary network protocols
Rationale: The linux kernel supports uncommon network protocols that are unneeded for what our goals are for this project. Therefore they should be disabled.
echo "install dccp /bin/true" >> /etc/modprobe.d/CIS.conf
echo "install sctp /bin/true" >> /etc/modprobe.d/CIS.conf
echo "install rds /bin/true" >> /etc/modprobe.d/CIS.conf
echo "install tipc /bin/true" >> /etc/modprobe.d/CIS.conf
Disable core dumps incase an application crashes
Rationale: A core dump is the memory of an executable program. It is generally used to determine why a program aborted. It can also be used to glean confidential information from a core file.
echo "* hard core 0" >> /etc/security/limits.conf
echo 'fs.suid_dumpable = 0' >> /etc/sysctl.conf
sysctl -p
echo 'ulimit -S -c 0 > /dev/null 2>&1' >> /etc/profile
Disable unnecessary services
Rationale: It is best practice for security to disable unnecessary services that are not required for operation to prevent exploitation.
systemctl disable avahi-daemon
systemctl disable triggerhappy.service
systemctl disable bluetooth.service
Change the pi user password
Rationale: The default password needs to be changed from raspberry. Strong passwords protect systems from being hacked through brute force methods. Password set cannot be a dictionary word, meet certain length, and contain a mix of characters.
passwd pi
General Remarks & Useful Notes
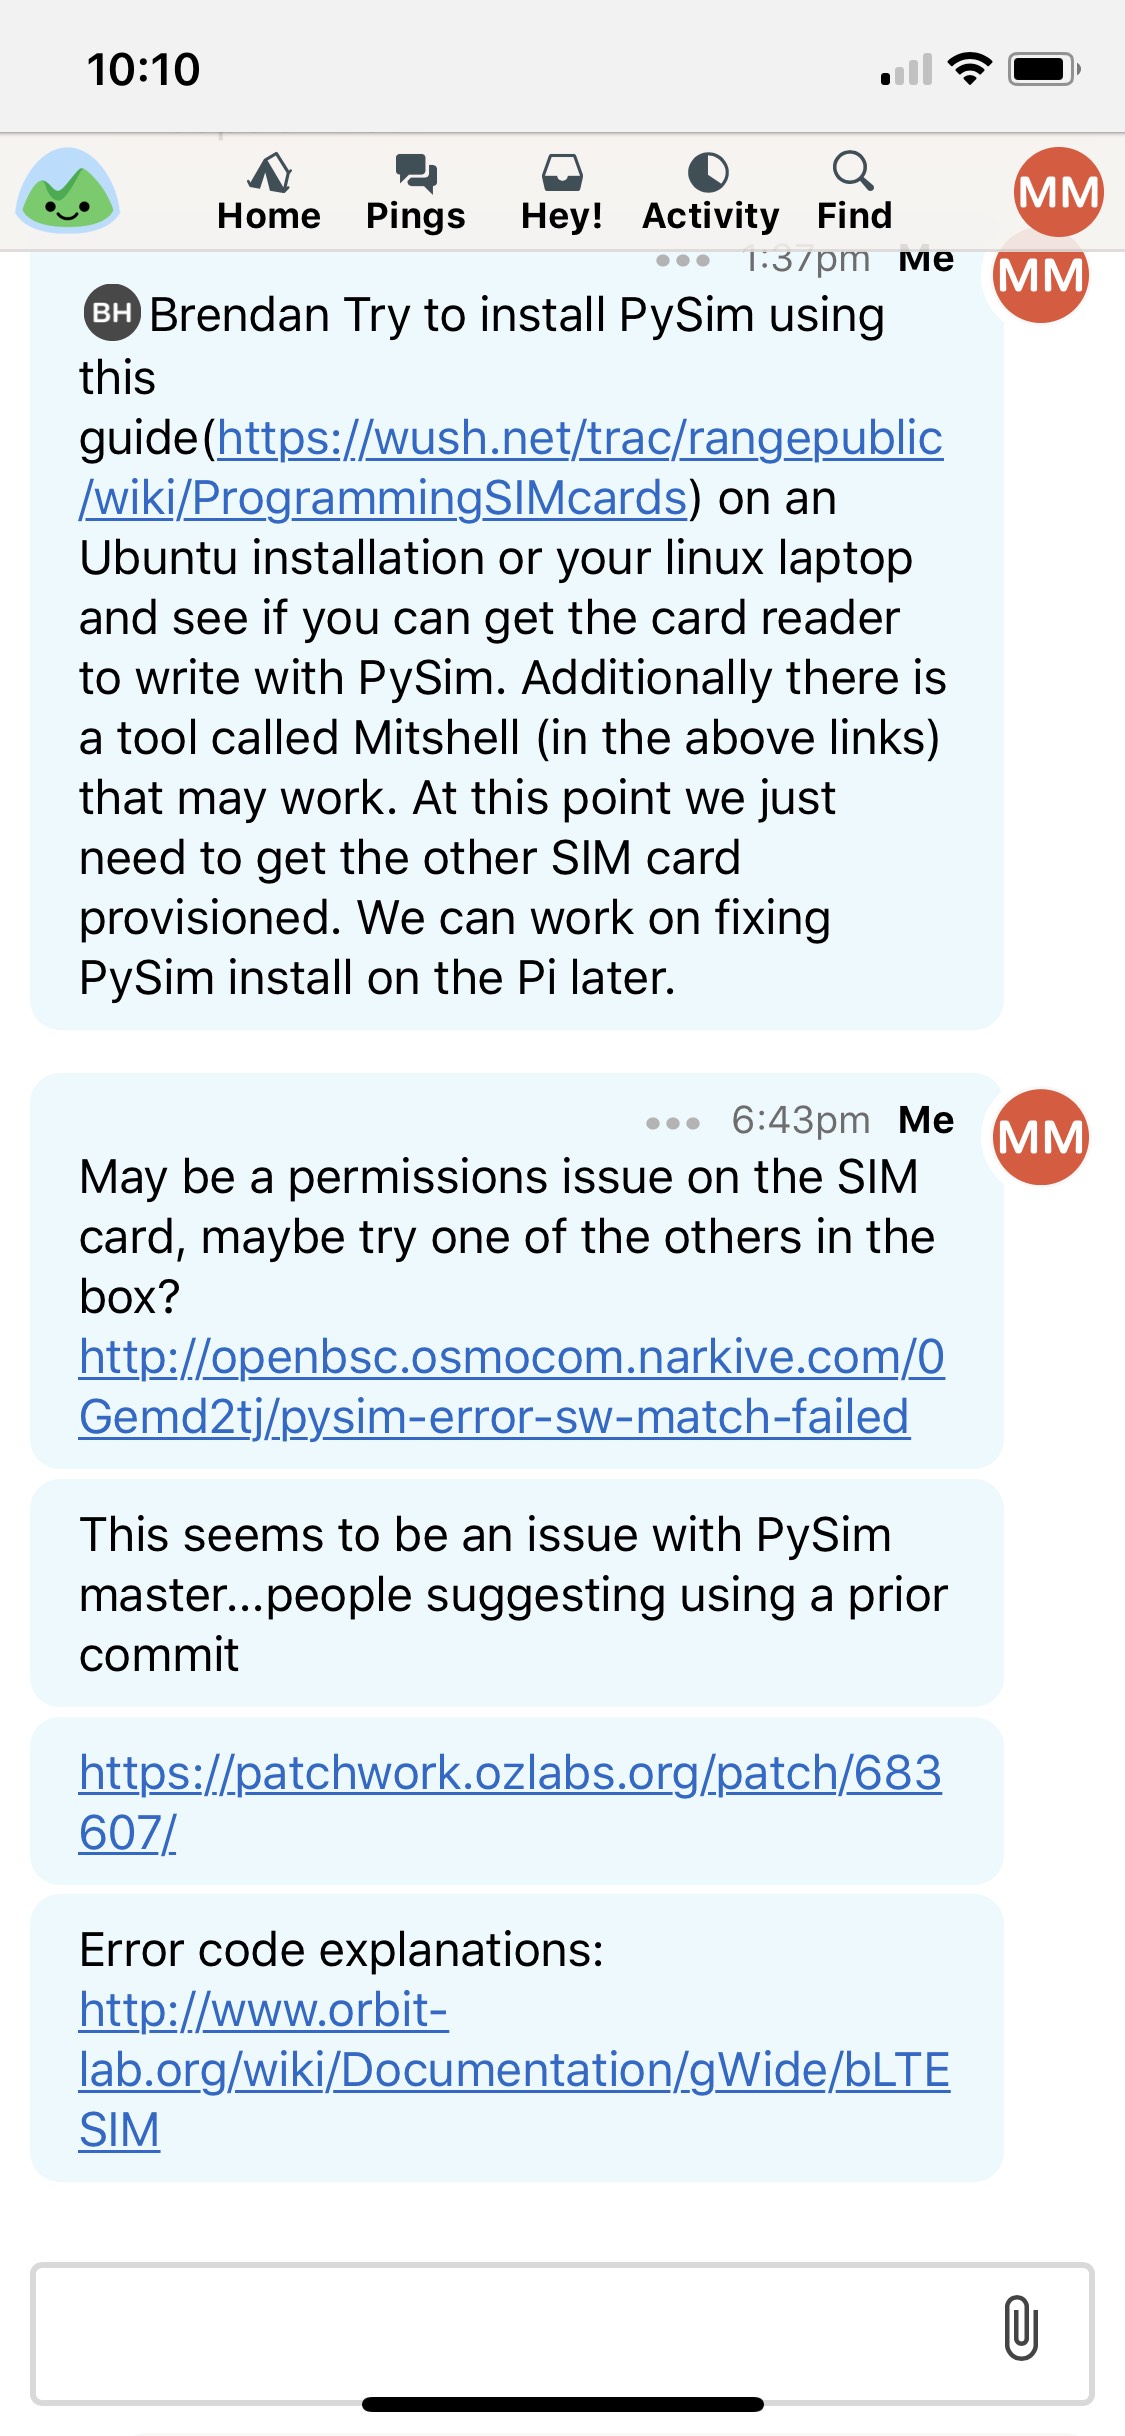
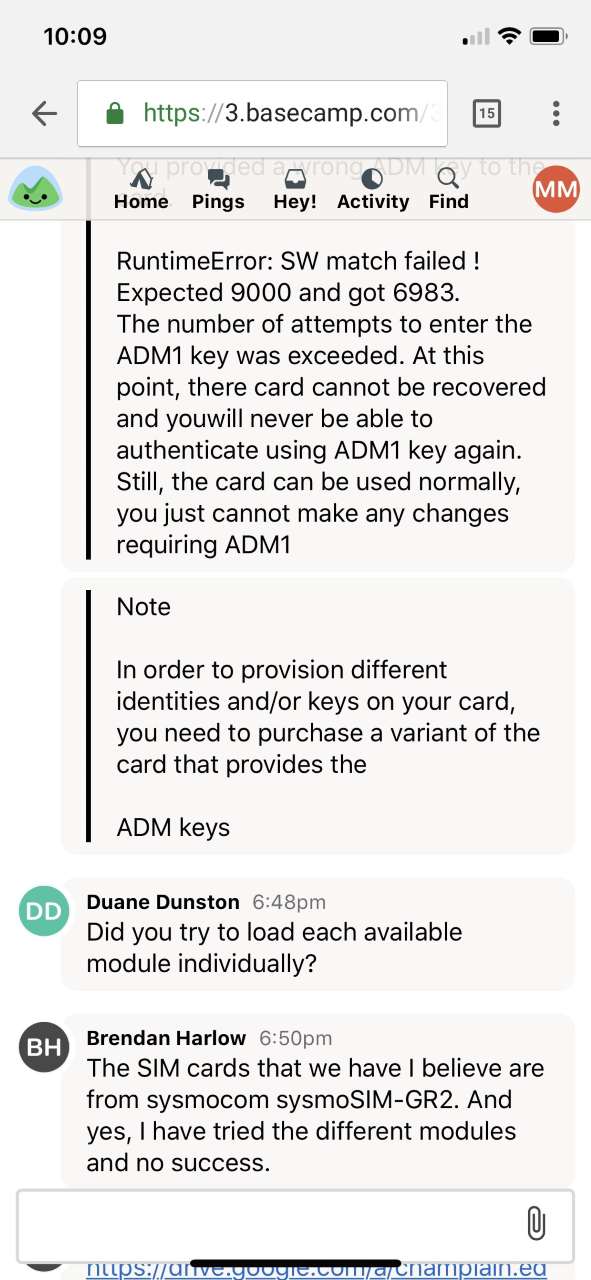
PySIM Struggles
apt-get install python-setuptools python-pyscard python-dev swig libccid pcscd pcsc-tools libpcsclite-dev
#Possibly Remove This
|git clone https://github.com/LudovicRousseau/pyscard.git
|cd pyscard
|sudo python setup.py install

cd /usr/src
git clone git://git.osmocom.org/pysim pysim
cd /usr/local/bin
ln -s /usr/src/pysim/pySim-prog.py pySim-prog.py
which pySim-prog.py
add $pysim_path = "/usr/local/bin"; to /var/www/html/nib/config.php
Real-world range testing:
- ~60’ between phones through walls
- ~100’ between phones open hallway
Useful directories:
- Path to shared files directory
- /usr/local/share/yate
- Path to conf files directory
- /usr/local/etc/yate
- Path to user files directory
- /root/.yate
- Path to modules directory
- /usr/local/lib/yate
Testing
- The Yate NIB setup includes an ELIZA chat bot that you can communicate with by sending SMS messages to 35492.
- This is a good way to test use of a single device.
- Android Phone Config Menu
- Dial
*#*#4636#*#*
- Dial
Special Thanks To…
- http://stackoverflow.com/questions/8903239/how-to-calculate-time-difference-in-bash-script
- https://www.modmypi.com/blog/raspberry-pi-7-touch-screen-assembly-guide
- https://www.element14.com/community/docs/DOC-78156/l/raspberry-pi-7-touchscreen-display
- http://www.orbit-lab.org/wiki/Documentation/gWide/bLTESIM
- https://wush.net/trac/rangepublic/wiki/ProgrammingSIMcards
- http://javacard.vetilles.com/2006/09/26/status-words-in-iso7816/
- https://sourceforge.net/p/openlte/discussion/general/thread/89479a03/?limit=25
- http://www.smartcardfocus.us/shop/ilp/id~618/acr38t-d1/p/index.shtml
- https://github.com/osmocom/pysim
- http://hackaday.com/2016/04/08/build-your-own-gsm-base-station-for-fun-and-profit
- https://github.com/Nuand/bladeRF/wiki/Setting-up-Yate-and-YateBTS-with-the-bladeRF
- http://wiki.yatebts.com/index.php/PySIM
- http://forum.yate.ro/index.php?topic=299.0
- http://stackoverflow.com/questions/14426491/python-3-importerror-no-module-named-setuptools
- https://github.com/LudovicRousseau/pyscard/issues/15
- http://www.linuxquestions.org/questions/linux-newbie-8/install-pyscard-package-on-ubuntu-error-gcc-failed-with-status-1-a-736085/
- http://stackoverflow.com/questions/21530577/fatal-error-python-h-no-such-file-or-directory
- https://ludovicrousseau.blogspot.com/2010/04/pcsc-sample-in-python.html
- http://stackoverflow.com/questions/92802/what-is-the-linux-equivalent-to-dos-pause
- https://github.com/MBRO95/PortableCellNetwork
- http://raspberrypi.stackexchange.com/questions/4444/enabling-ssh-on-rpi-without-screen-keystrokes-for-raspi-config
- http://unix.stackexchange.com/questions/48535/can-grep-return-true-false-or-are-there-alternative-methods
- http://forum.yate.ro/index.php?topic=497.0
- https://github.com/Nuand/bladeRF
- http://mcc-mnc.com/
- https://github.com/Nuand/bladeRF/wiki/Setting-up-Yate-and-YateBTS-with-the-bladeRF
- http://forum.yate.ro/index.php?topic=1178.0
- https://blog.strcpy.info/2016/04/21/building-a-portable-gsm-bts-using-bladerf-raspberry-and-yatebts-the-definitive-guide/
- https://nuand.com/forums/viewtopic.php?f=9&t=3862
- http://superuser.com/questions/1150752/installing-software-with-missing-library-libusb1-0
- http://wiki.yatebts.com/index.php/Network_in_a_Box
- https://www.att.com/deviceunlock/#/
- http://wiki.yatebts.com/index.php/PySIM
- http://forum.yate.ro/index.php?topic=299.0
- http://stackoverflow.com/questions/14426491/python-3-importerror-no-module-named-setuptools
- https://github.com/LudovicRousseau/pyscard/issues/15
- http://www.linuxquestions.org/questions/linux-newbie-8/install-pyscard-package-on-ubuntu-error-gcc-failed-with-status-1-a-736085/
- http://stackoverflow.com/questions/21530577/fatal-error-python-h-no-such-file-or-directory
- https://ludovicrousseau.blogspot.com/2010/04/pcsc-sample-in-python.html
- https://wush.net/trac/rangepublic/wiki/ProgrammingSIMcards
- http://forum.yate.ro/index.php?topic=497.0
- https://github.com/Nuand/bladeRF
- http://mcc-mnc.com/
- https://github.com/Nuand/bladeRF/wiki/Setting-up-Yate-and-YateBTS-with-the-bladeRF
- http://forum.yate.ro/index.php?topic=1178.0
- https://blog.strcpy.info/2016/04/21/building-a-portable-gsm-bts-using-bladerf-raspberry-and-yatebts-the-definitive-guide/
- https://nuand.com/forums/viewtopic.php?f=9&t=3862
- http://superuser.com/questions/1150752/installing-software-with-missing-library-libusb1-0